To install the ESP32 board in your Arduino IDE, follow these next instructions:
Step 1 to install ESP32 in Arduino IDE boards
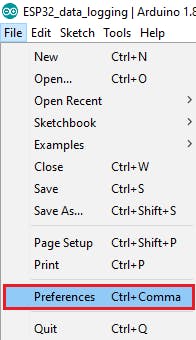
In your Arduino IDE, go to File> Preferences
- In your Arduino IDE, go to File> Preferences
- Enter https://dl.espressif.com/dl/package_esp32_index.json into the “Additional Board Manager URLs” field as shown in the figure below. Then, click the “OK” button:
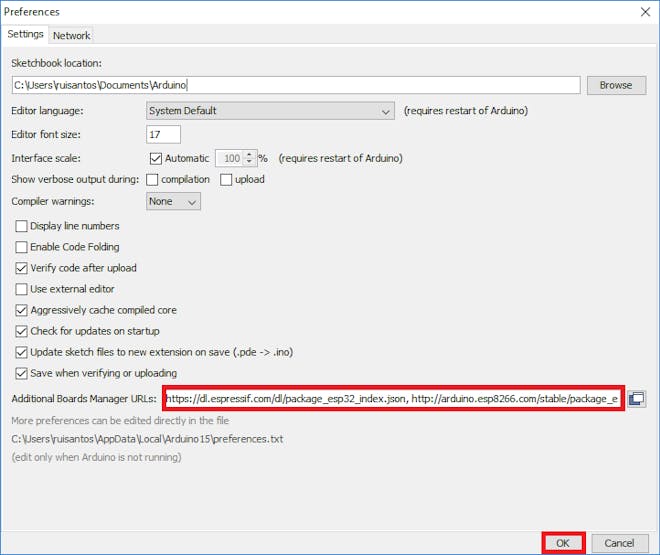
Note: if you already have the ESP8266 board URL, you can separate the URLs with a comma as follows:
https://dl.espressif.com/dl/package_esp32_index.json, http://arduino.esp8266.com/stable/package_esp8266com_index.json- Note: if you already have the ESP8266 boards URL, you can separate the URLs with a comma as follows:https://dl.espressif.com/dl/package_esp32_index.json, http://arduino.esp8266.com/stable/package_esp8266com_index.json
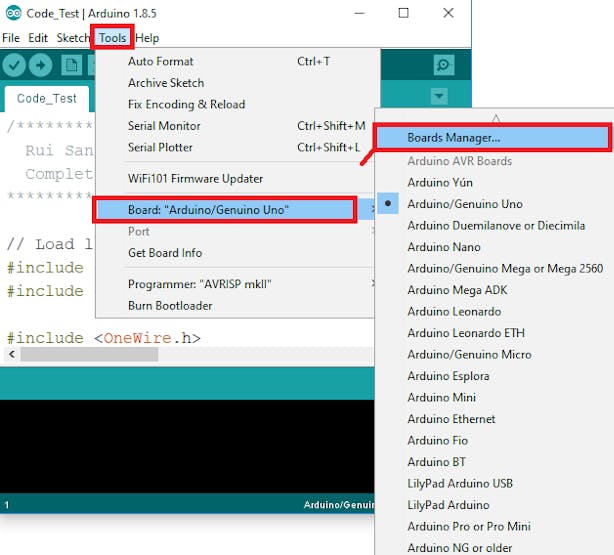
Open the Boards Manager. Go to Tools > Board > Boards Manager…
- Open the Boards Manager. Go to Tools > Board > Boards Manager…
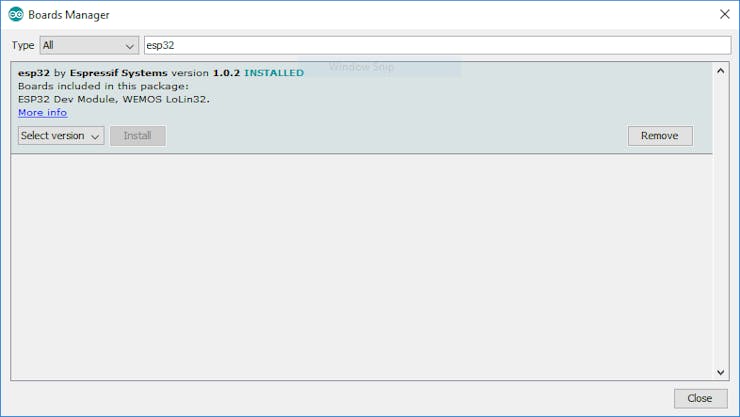
- Search for ESP32 and press the install button for the “ESP32 by Espressif Systems“:
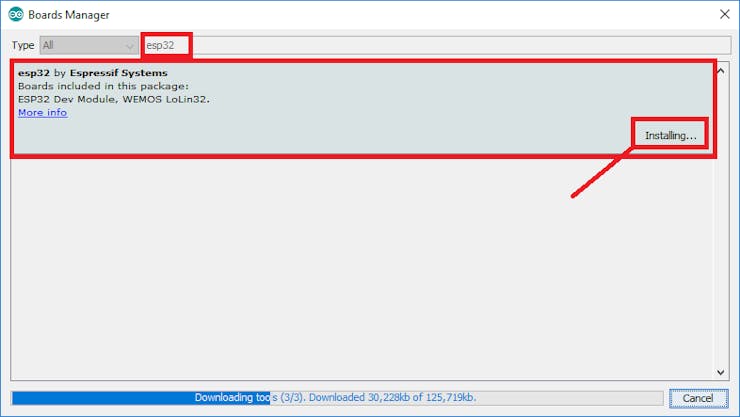
- That’s it. It should be installed after a few seconds.
Now you can program your esp32 with Arduino easily. Hurray!!!
Thank you for reading and check out our other posts with esp32 like – How to make IoT Door Lock with ESP32
Hi! I just wish to give you a big thumbs up for your great information you have here on this post. Ill be coming back to your blog for more soon.