This IoT door lock has one solenoid lock and an MC38 sensor controlled by the Blynk app using ESP32. The sensor gives real-time data on the door and the solenoid is used to lock the door.
To do this project we need to follow these steps.
Step1
Watch the YouTube video
Step2
Installing ESP32 Add-on in Arduino IDE
To install the ESP32 board in your Arduino IDE, follow these next instructions:
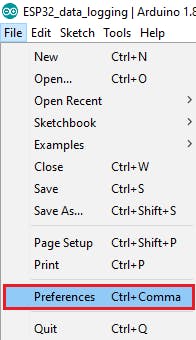
In your Arduino IDE, go to File> Preferences
- In your Arduino IDE, go to File> Preferences
- Enter https://dl.espressif.com/dl/package_esp32_index.json into the “Additional Board Manager URLs” field as shown in the figure below. Then, click the “OK” button:
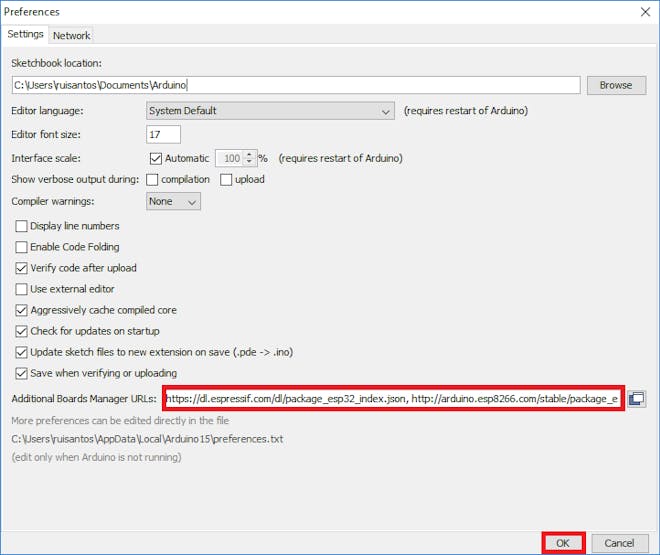
Note: if you already have the ESP8266 board URL, you can separate the URLs with a comma as follows:
https://dl.espressif.com/dl/package_esp32_index.json, http://arduino.esp8266.com/stable/package_esp8266com_index.json- Note: if you already have the ESP8266 boards URL, you can separate the URLs with a comma as follows:https://dl.espressif.com/dl/package_esp32_index.json, http://arduino.esp8266.com/stable/package_esp8266com_index.json
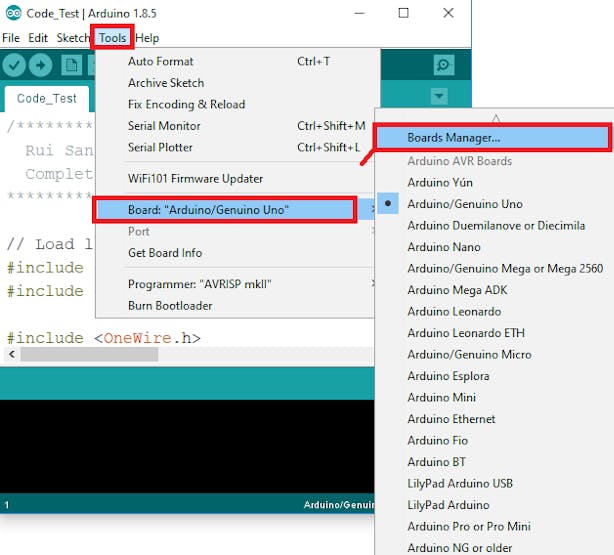
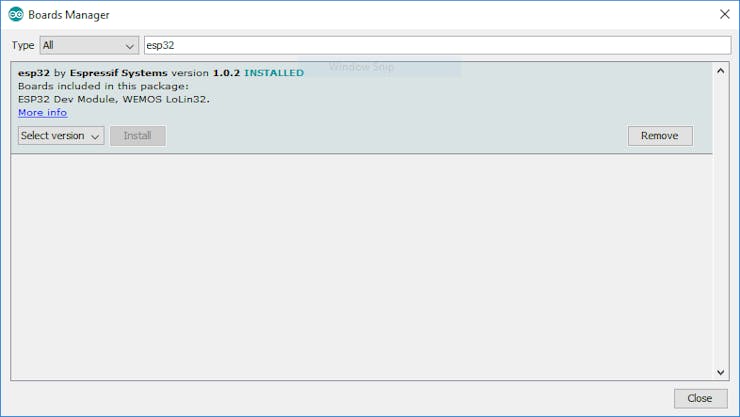
Open the Boards Manager. Go to Tools > Board > Boards Manager…
- Open the Boards Manager. Go to Tools > Board > Boards Manager…
- Search for ESP32 and press the install button for the “ESP32 by Espressif Systems“:
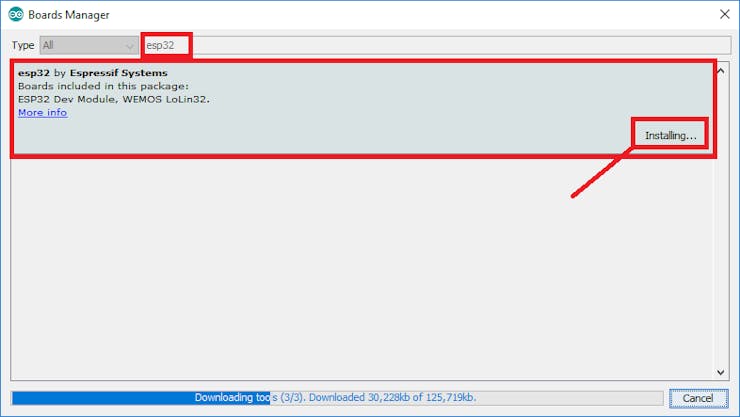
- That’s it. It should be installed after a few seconds.
Step 3
1. Install Blynk Library using the built-in library manager in Arduino IDE
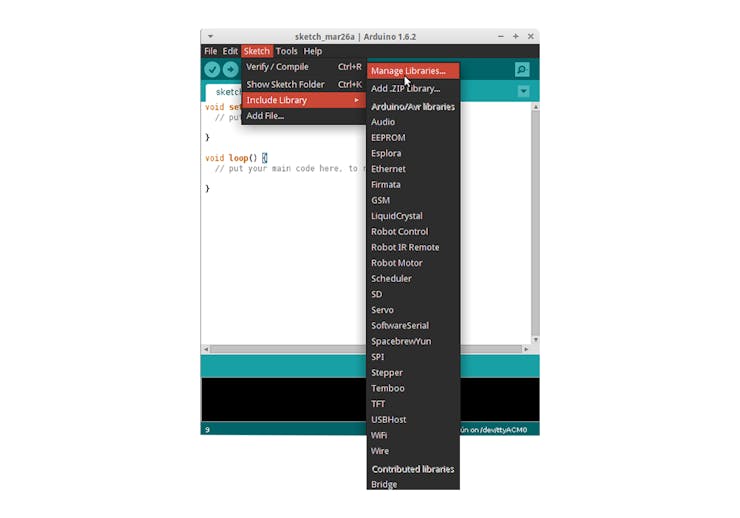
To install a new library into your Arduino IDE, you can use the Library Manager (available from IDE version 1.6.2). Open the IDE and click on the “Sketch” menu and then Include Library > Manage Libraries.
Then the Library Manager will open, and you will find a list of already installed or ready for installation. Search for Blynk library and in the version, selection choose the latest version to date
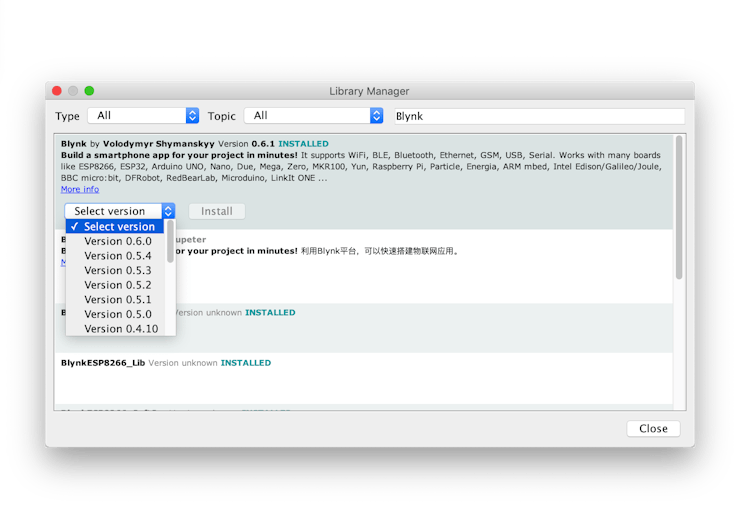
Finally, click on Install and wait for the IDE to install the new library. Downloading may take time depending on your connection speed. Once it has been finished and Installed tag should appear next to the Bridge library. You can close the library manager.
You can now find the new library available in the Sketch > Include Library menu.
Step 4
The circuit looks like this.

Step 5
The PCB was designed using easyeda software and it looks like this.
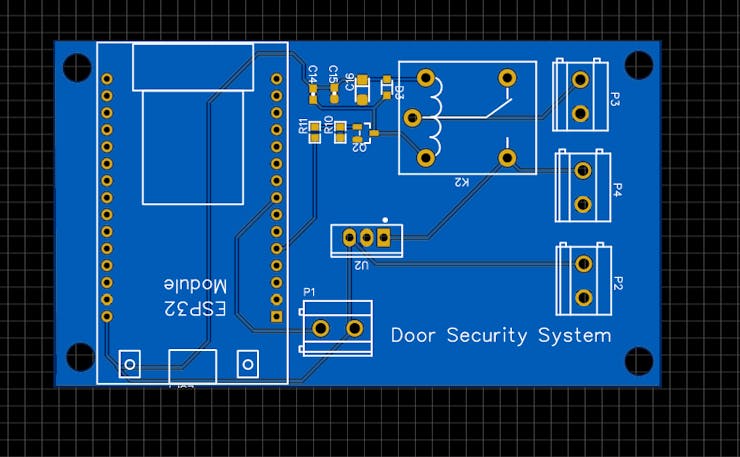
And it was ordered from the JLCPCB website using this link
$2 for 1-4 Layer PCBs, Get Free SMT Coupons →https://jlcpcb.com/IYB
Step 6
Now follow the steps provided in the video to download the Blynk app and upload the code. And Enjoy your door lock. You can also checkout other project such as How to make Line Follower Robot with Arduino
#define BLYNK_PRINT Serial

/* Fill-in your Template ID (only if using Blynk.Cloud) */
//#define BLYNK_TEMPLATE_ID   "YourTemplateID"


#include <WiFi.h>
#include <WiFiClient.h>
#include <BlynkSimpleEsp32.h>

// You should get Auth Token in the Blynk App.
// Go to the Project Settings (nut icon).
char auth[] = "YourAuthToken";

// Your WiFi credentials.
// Set password to "" for open networks.
char ssid[] = "YourNetworkName";
char pass[] = "YourPassword";

void setup()
{
  // Debug console
  Serial.begin(9600);

  Blynk.begin(auth, ssid, pass);
}

void loop()
{
  Blynk.run();
  state = digitalRead(15);
  if(state != pstate)
  {
    Blynk.virtualWrite(V1,state);
    pstate = state;
  }
}
You need to take part in a contest for one of the finest sites on the internet.
I will highly recommend this blog!
Excellent, what a weblog it is! This website presents
valuable data to us, keep it up.
I need to to thank you for this wonderful read!! I absolutely loved every bit of it.
I’ve got you book marked to check out new things you post…
имитированная икра: из чего ее делают, полезное воздействие в случае урон.
Равно как различить природную икру от искусственной
Id like to thank you for the efforts you have put in penning this website. I am hoping to see the same high-grade blog posts from you in the future as well. In fact, your creative writing abilities has inspired me to get my own website now 😉
Does your site have a contact page? I’m having problems locating it but, I’d like to send
you an e-mail. I’ve got some recommendations for your blog you might be interested
in hearing. Either way, great blog and I look forward to seeing it grow over time.